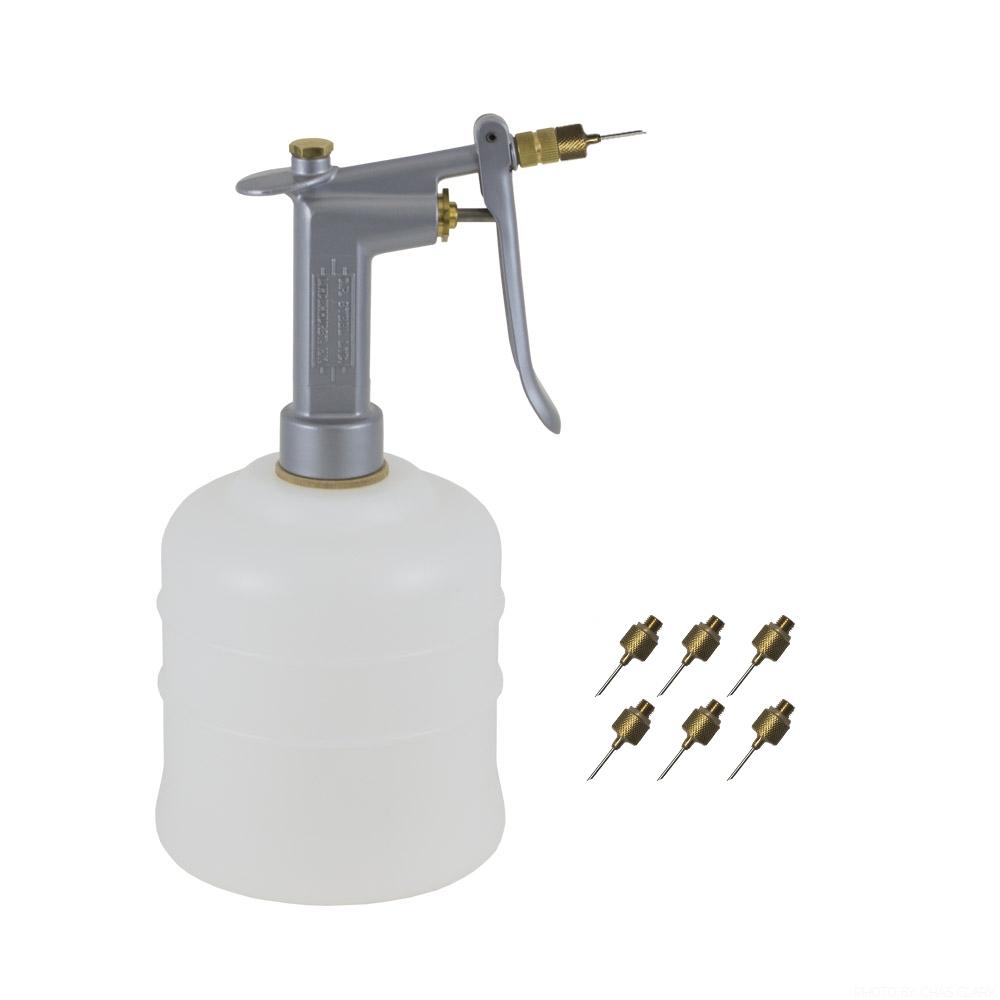
How to prime/trouble shoot your Grip Removal Gun
 The following tips are for grip guns that fail to prime properly or lose pressure during use. We will start with the easiest fixes first and progress to the more in-depth repairs. After each step, re-test the grip gun.
Quick Fixes:
- Ensure that there is enough liquid in the reservoir. If the liquid level is low, it can allow air in the intake tube, preventing the pump from drawing on the solvent. This situation prevents priming.
- Check all fittings on the grip gun to ensure they are all secured, creating an airtight seal. This includes the valve cover under that grip gun’s trigger, the valve cover located on the top of the gun, and the seal between the gun and the solvent reservoir.
- Check the gasket located between the grip gun and reservoir tank. The gun will not function properly if the gasket is damaged or fails to create an airtight seal.
- The grip gun contains springs and ball bearings that allow it to operate. After time on the shelf, these springs and ball bearings will settle and may stick to each other or the pump housing. To knock them loose, firmly strike the back of the grip gun on a table edge a few times.
Checking the top ball valve
Ensure the valve cover located on the top of the gun seals tightly. If you don’t have an airtight seal, the grip gun will not operate properly, including being unable to prime.
Remove the valve cover, located on the top of the grip gun, using a crescent wrench. Inside the valve, you will find a spring and ball. Clean both the spring and the ball with isopropyl alcohol or acetone. To reassemble, put the ball in the valve first, followed by the spring with the narrow side of the spring facing down. Tighten the valve cover tightly to ensure an airtight seal.
Checking the intake tube
To remove the intake, disconnect the pump from the reservoir. Place the white intake tube into a vise with the pump side up and tighten just enough to prevent it from spinning. Turn the pump counterclockwise to separate the intake tube from the pump housing.
Now turn the white intake tube over in the vise and remove the brass intake housing with a crescent wrench. Inside the housing, you will find a spring and ball bearing. Clean off the spring and ball with isopropyl alcohol or acetone. Verify the bottom screen of the intake housing is clear of obstructions or debris. Check the white intake tube to verify it is free of obstacles as well. To rebuild the intake housing, place the ball bearing in first and the spring on top. The spring is directional, with one end reducing in circumference to hold the ball bearing in place. Re-assemble the grip gun in reverse order. If the grip gun still will not prime or maintain pressure continue with the instructions.
Underneath the pump trigger is the pump housing. The pump cover should be tightly sealed. If the cover isn’t tight, it will allow air into the pump preventing it from priming / operating correctly.
Checking inside the pump housing
Use a crescent wrench to remove the pump cover found under the trigger of the grip gun. Inside you will find a spring and piston. Remove and clean the piston with isopropyl alcohol or acetone. Reassemble in the reverse order.