
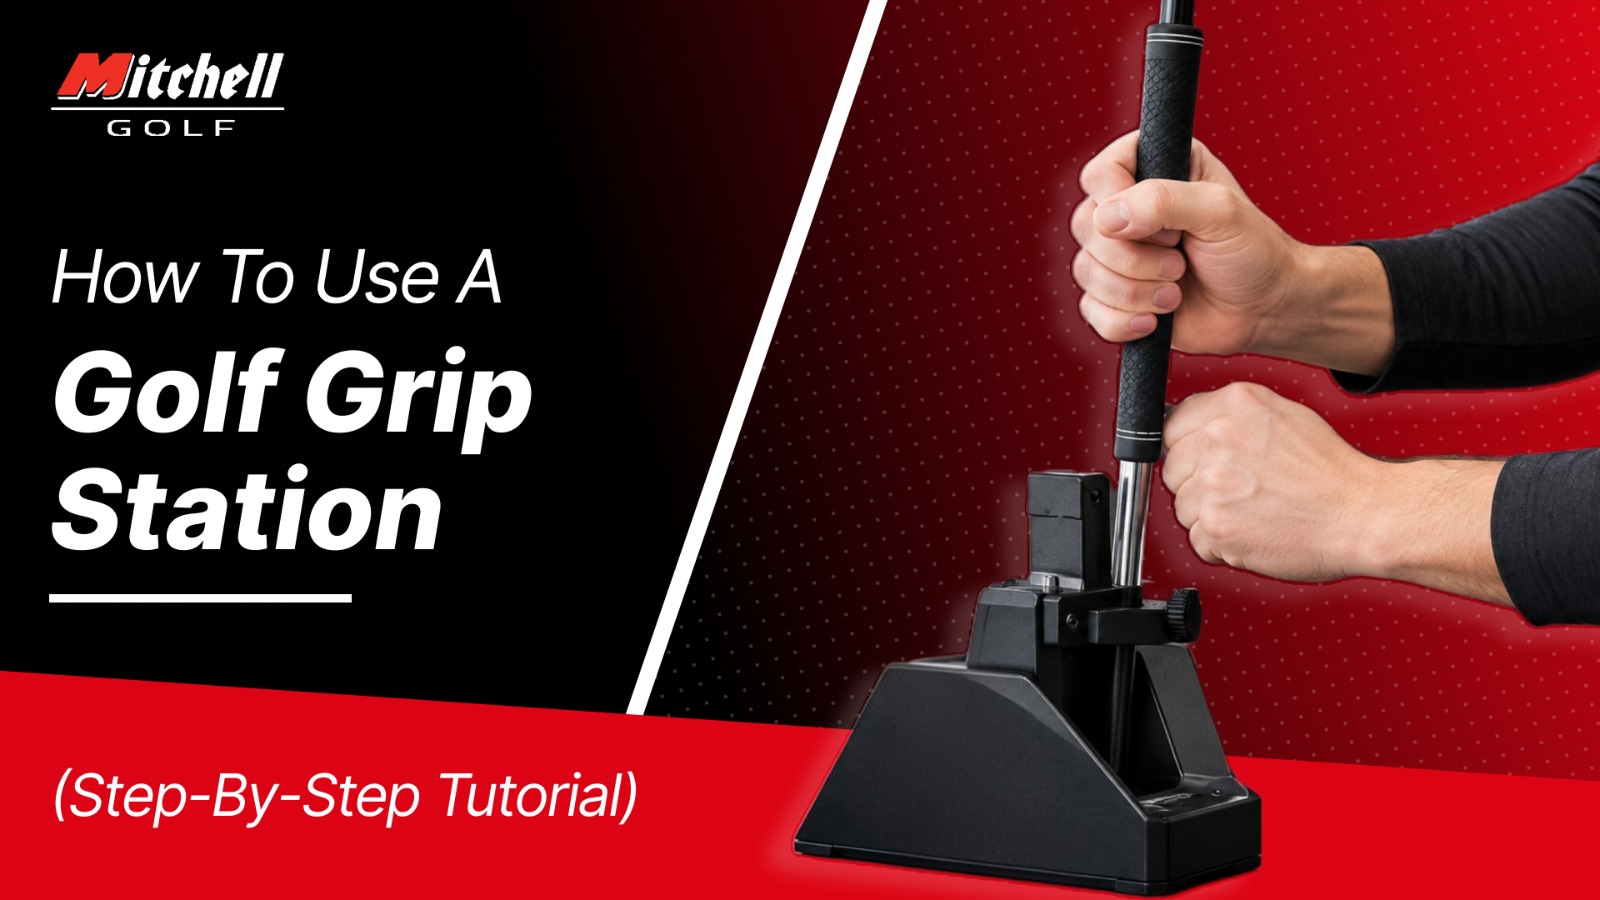
If you have ever tried to regrip a golf club by pinning it between your knees, you already know why the professionals do it differently. A golf grip station turns a fiddly, two-handed wrestling match into a controlled, repeatable process one that every major club manufacturer’s production line, every PGA Tour van, and every serious club-building shop has relied on for decades. This guide walks through exactly how to use a golf grip station from first clamp to finished install, using the same technique Mitchell Golf has documented for club builders since 1988.
Whether you are running a bench, floor, or portable grip station for the first time, or you have been regripping clubs for years and want to tighten up your process, this tutorial covers the tools, the setup, the nine-step installation sequence, and the mistakes that cause the majority of grip failures in the field.
A grip is the only point of physical contact between a player’s hands and the club, and it degrades faster than almost any other component. Most instructors recommend replacing grips once or twice a year for a regular player, which is why regripping is one of the highest-frequency tickets in any pro shop’s repair business and why doing it on a dedicated station, rather than improvising, matters.
1. What Is a Golf Grip Station and Why It Matters
A golf grip station is a dedicated fixture mounted to a bench, standing on the floor, or clamped portably to any table — built around one job: holding a golf club shaft perfectly still while a technician removes an old grip and installs a new one. At its core is a quick-release shaft clamp with rubber-faced jaws, usually paired with a solvent recovery tray, a tape dispenser, and an alignment reference for squaring the grip to the clubface.
The difference between a grip station install and a kitchen-table install is not cosmetic. A stationary, correctly clamped shaft lets you cut old grips cleanly without nicking a graphite wall, apply tape without wrinkles or gaps, and slide a new grip home while the solvent is still active all without the shaft rotating or the club sliding out of position.
Why This Matters for Fitting Accuracy: A grip that is even a few degrees off-square changes how the clubface presents at impact, which can mask or exaggerate real loft and lie issues during a fitting session. Getting the grip step right is foundational, not cosmetic.
2. Types of Grip Stations: Bench, Floor & Portable
Mitchell Golf builds grip stations in three configurations, and choosing the right one depends on your volume, space, and whether the fixture needs to travel.
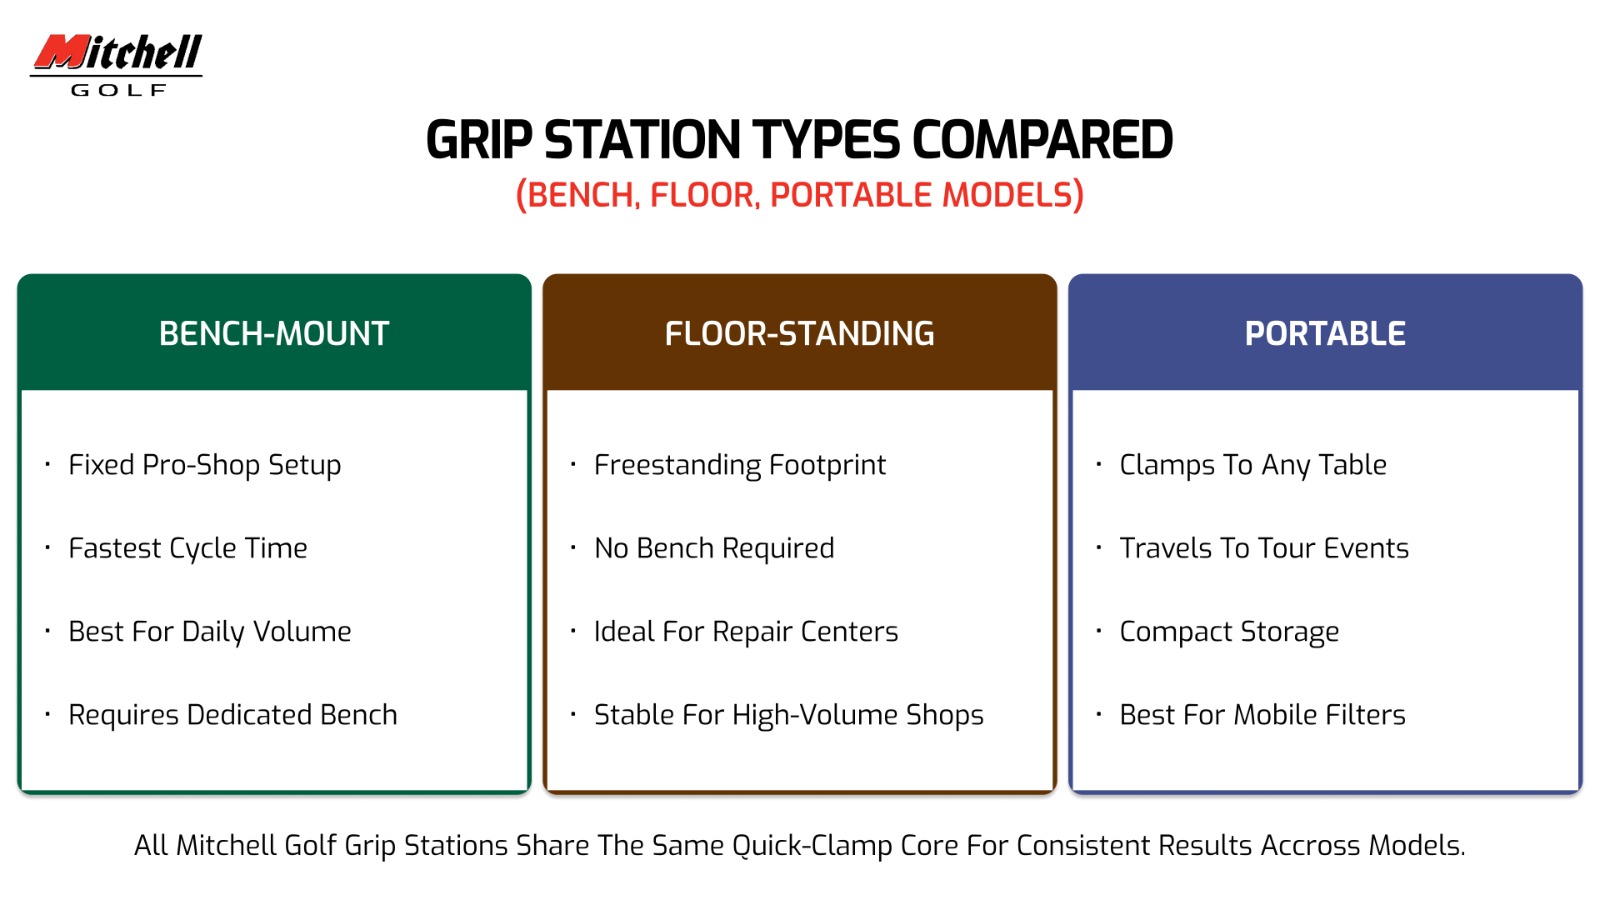
Bench-mount, floor-standing, and portable grip stations share the same quick-clamp core but suit different shop workflows.
| Station Type | Best For | Setup | Typical Cycle Time |
|---|---|---|---|
| Bench-Mount | Pro shops, high daily volume | Fixed to dedicated workbench | Fastest — under 5 min/club |
| Floor-Standing | Repair centers, no bench available | Freestanding, bolted or weighted base | Comparable to bench, more stable |
| Portable | Mobile fitters, traveling technicians | Clamps to any table edge | Slightly slower setup, same quality |
3. Tools & Materials Checklist
Before you clamp the first club, stage everything within arm’s reach. Stopping mid-install to hunt for a rag or a fresh blade is how solvent dries out and grips end up stuck half-on.
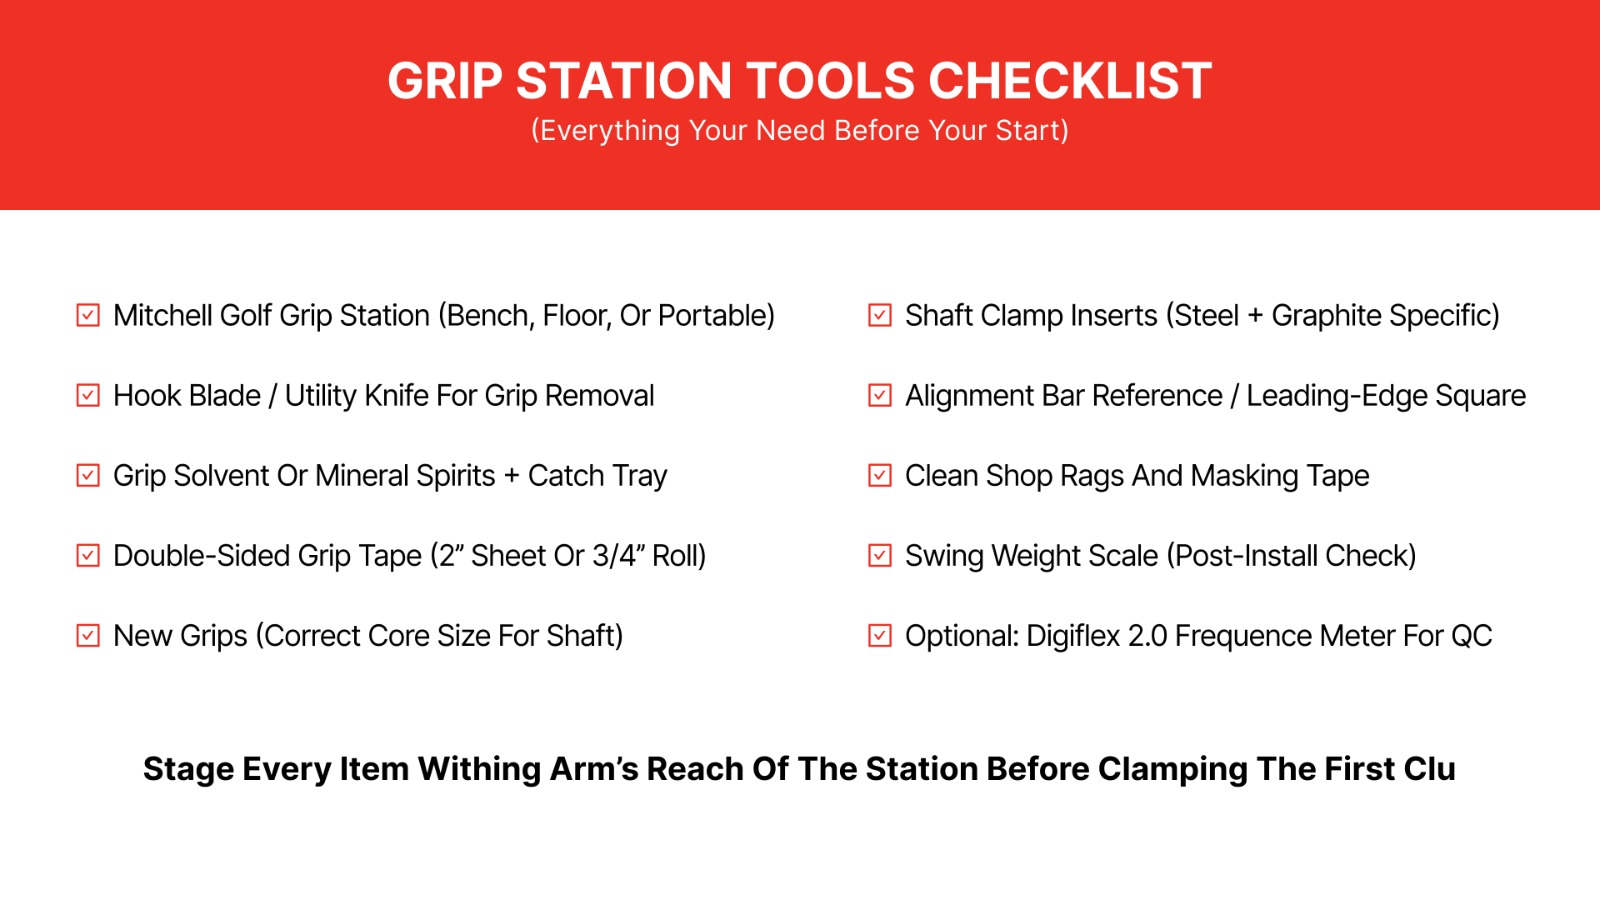
Stage all ten items before starting your first club of the session.
- Mitchell Golf grip station (bench, floor, or portable)
- Hook blade or utility knife for grip removal
- Grip solvent or odorless mineral spirits, plus a catch tray
- Double-sided grip tape (2-inch sheet or 3/4-inch roll)
- New grips sized to the correct core diameter for each shaft
- Clamp inserts rated for steel and graphite shafts
- Alignment bar or leading-edge square
- Clean shop rags and masking tape
- Swing weight scale for a post-install check
Optional: a DigiFlex 2.0 frequency meter for shaft QC before regripping
4. Grip Station Anatomy: Understanding Every Component
Knowing what each part of the station does prevents most first-time mistakes. Here is the anatomy of a standard bench-mount Mitchell Golf grip station.
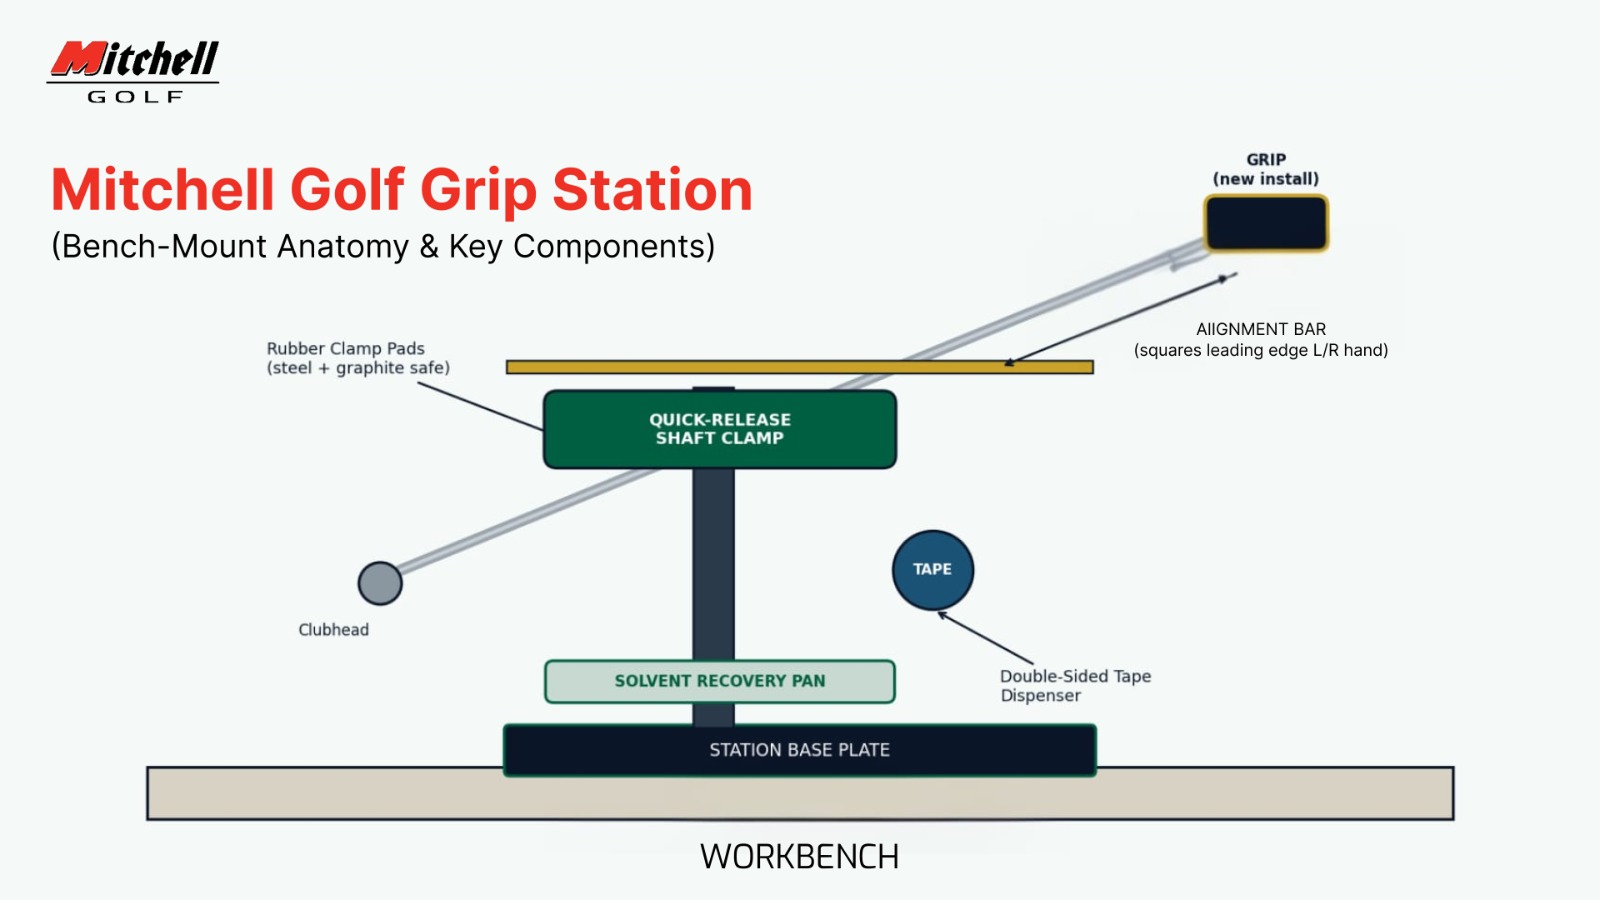
Key components of a bench-mount grip station: base plate, quick-release clamp, alignment bar, tape dispenser, and solvent recovery pan.
- Base plate – anchors the entire fixture to the bench or floor stand, keeping it rigid under clamp pressure.
- Quick-release shaft clamp – rubber-padded jaws that grip the shaft firmly without crushing it.
- Alignment bar – a fixed reference edge used to square the clubhead’s leading edge for right- and left-handed clubs.
- Tape dispenser – holds and feeds double-sided grip tape cleanly, avoiding wrinkles.
- Solvent recovery pan – catches excess solvent as it drains off the shaft.
5. Step-by-Step Tutorial: How to Use a Golf Grip Station
This is the core workflow the same nine-step sequence used on Mitchell Golf’s own production floor and referenced in the company’s technical measuring and bending documentation. Follow it in order for a clean, tour-quality install every time.
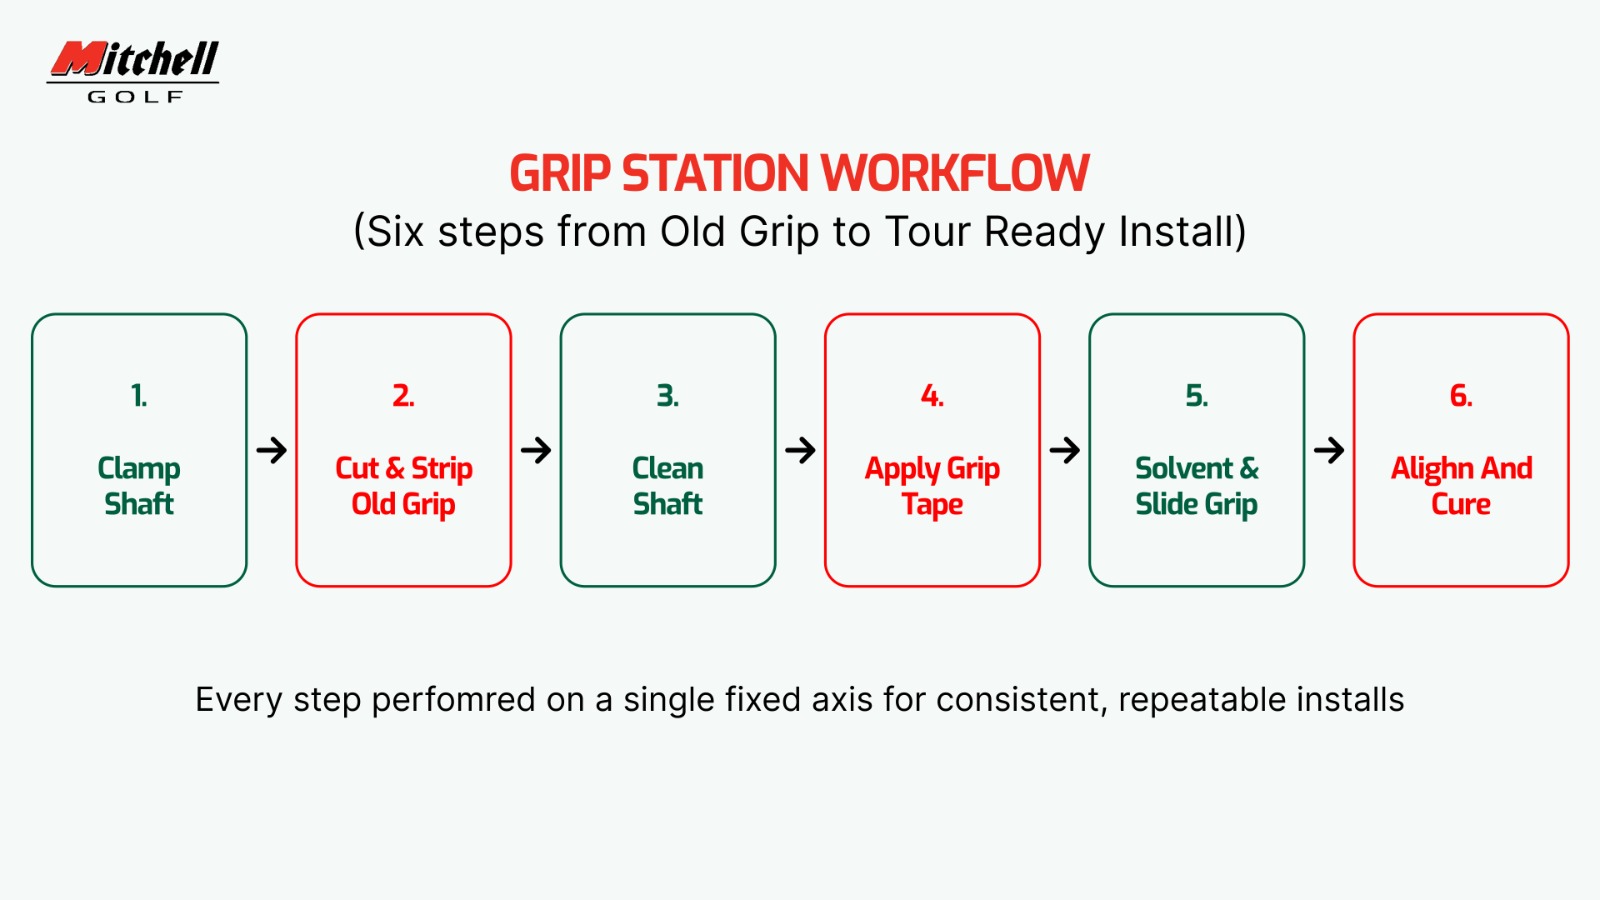
The full regripping cycle from clamp to cure, performed on a single fixed axis for repeatable results.
Step 1: Set Up Your Station and Stage Materials
Open the quick-release clamp, confirm the correct rubber insert is installed for the shaft material you are working with, and lay out your blade, tape, solvent, catch tray, and new grip within reach.
Step 2: Clamp the Shaft Correctly
Position the club so the shaft sits in the clamp’s mid-section never within a few inches of the tip, and never right up against the hosel or the grip end. Close the jaws until the shaft cannot rotate under hand pressure, but stop as soon as it’s snug.
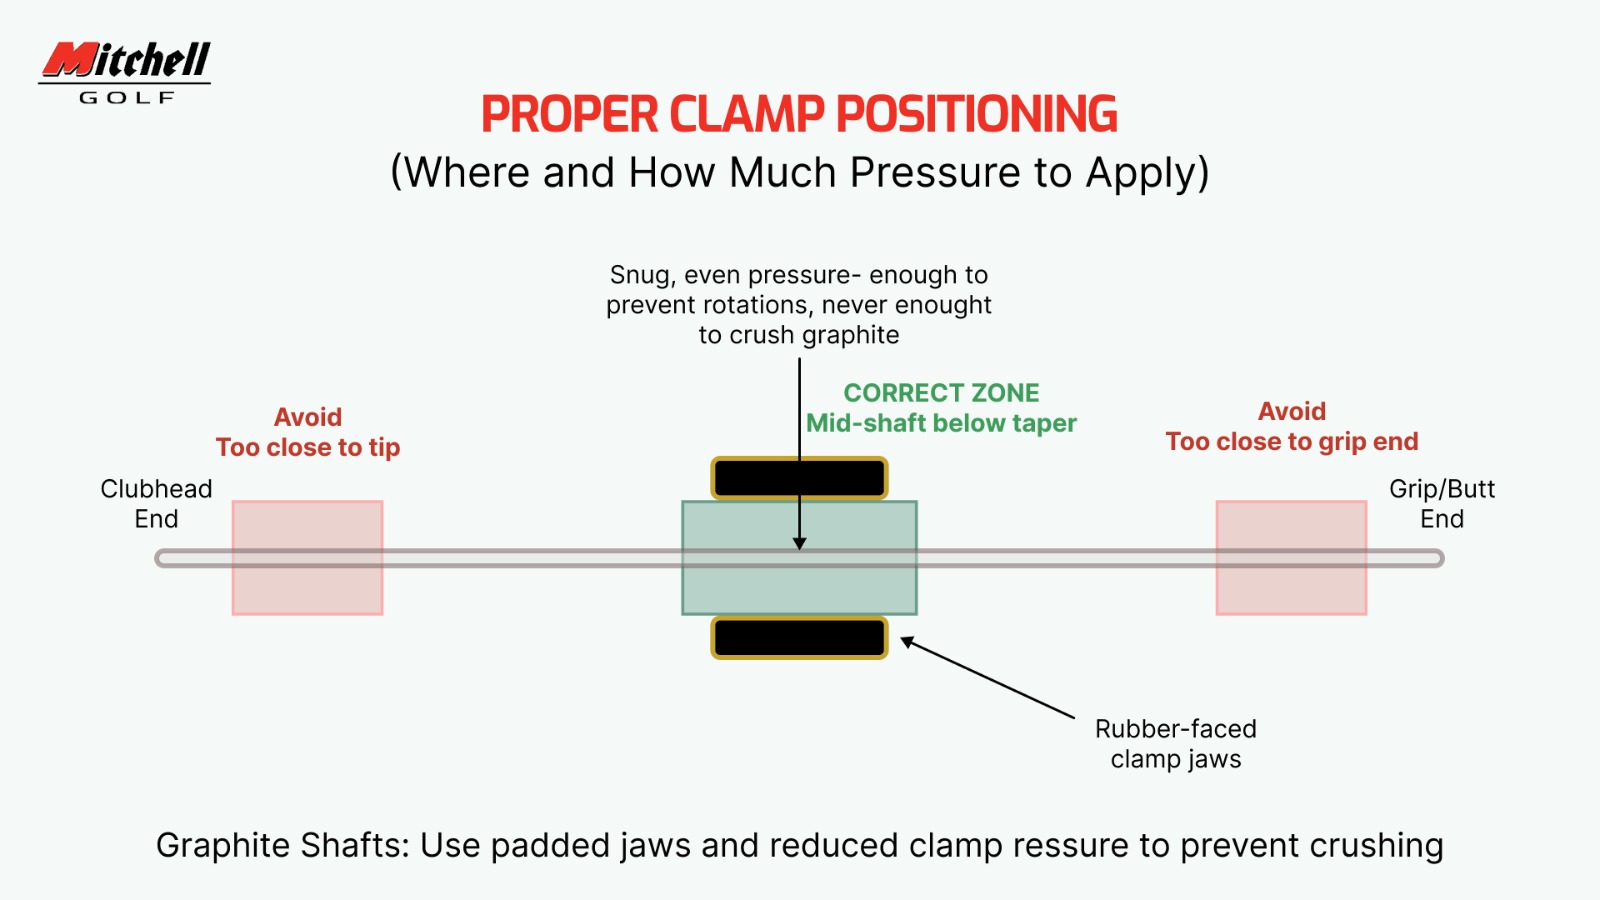
Clamp in the mid-shaft zone only – avoid the tip section and the area closest to the grip end.
Step 3: Remove the Old Grip
With the shaft locked, run a hook blade lengthwise under the old grip from the butt end toward the clubhead, cutting through the grip material without pressing into the shaft wall.
Step 4: Clean the Shaft
Wipe the exposed shaft with a solvent-dampened rag to remove old adhesive, oils, and grime. The surface needs to be completely clean before new tape goes on.
Step 5: Apply Double-Sided Grip Tape
Wrap tape from the butt end down toward the clubhead, overlapping edges slightly and smoothing out any air pockets. Add a second layer only where the manufacturer specifies.
Step 6: Apply Solvent
Cover the open end of the shaft, saturate the taped section with solvent over the recovery pan, then release the solvent down the length of the tape.
Step 7: Install the New Grip
Immediately slide the new grip on in one continuous motion until it seats fully against the butt end. Hesitating partway through can cause the grip to stall on drying tape.
Step 8: Align the Grip to the Clubface
While the solvent is still active, set the club in playing position against the alignment bar and rotate the grip so its logo or alignment line sits square to the leading edge.
Step 9: Cure and Quality Check
Stand the club grip-down for at least 30 minutes, then let it sit for a full 24 hours before hard use. Verify swing weight on a scale once cured.
Pro Tip: Regrip an entire set in the same sitting when possible. Doing every club back-to-back keeps clamp pressure, tape overlap, and alignment technique consistent across the whole set.
6. Solvent Method vs. Tape-Only Method: Which Should You Use?
Nearly all professional installs use tape-plus-solvent, but it’s worth understanding why, especially if you have seen “no-solvent” grip kits marketed for convenience.
| Method | Bond Quality | Install Speed | Best Use Case |
|---|---|---|---|
| Tape + solvent | Strongest, industry standard | Fast once practiced | Pro shops, fitting centers, Tour vans |
| Tape only (dry) | Weaker initial bond | Slower – grip often stalls | Emergency field fixes only |
| Water-activated strips | Moderate, convenience-oriented | Fast for single-club jobs | Occasional at-home DIY changes |
The reason solvent-based tape installs dominate professional shops isn’t tradition it’s physics. Solvent temporarily lubricates the tape’s adhesive layer, and as it evaporates, the tape’s bond strength climbs to its full rated hold. Golf grip tape is engineered to resist torque loads that can exceed 50 pounds during an aggressive swing, and dry or water-only methods simply don’t reach the same adhesion levels in testing.
7. What Grip Adhesion Data Tells Club Builders
Grip failure in the field is rarely dramatic it shows up as a grip that slowly rotates under torque over a season of play, or one that develops a soft spot where the tape never fully bonded. Independent adhesion testing has found that purpose-built double-sided golf grip tape substantially outperforms generic hardware or packing tape, with the gap widening further under heat and humidity — exactly the conditions a grip must survive for months in a golf bag.
For a deeper look at these fundamentals, see the GolfWorks regripping reference and general golf equipment research summarized by the
PGA of America, both of which reinforce the fundamentals taught in this guide.
8. Common Grip Station Mistakes and How to Avoid Them
Mistake: Over-Tightening the Clamp: Crushing a graphite shaft wall or ovaling a steel shaft under excess clamp pressure can write off the shaft entirely. Clamp only snug enough to stop rotation.
Mistake: Clamping Too Close to the Tip Section: The tip section of any shaft, especially graphite, is thinner-walled and more prone to stress fractures. Keep the clamp in the mid-shaft zone.
Mistake: Skipping the Alignment Step: Solvent gives you a short working window to rotate the grip square to the clubface. Rushing this step is the top cause of grips that feel twisted once cured.
Mistake: Letting Solvent Dry Before the Grip Is Seated: If more than a few seconds pass between applying solvent and sliding the grip on, the tape can tack up and the grip will stall halfway.
9. Graphite vs. Steel: Clamp Pressure Considerations
- Steel shafts: Tolerant of firmer clamp pressure, but can still ovalize if over-tightened repeatedly in the same spot.
- Graphite shafts: Composite walls compress more easily and can develop micro-fractures under excess pressure. Always use graphite-rated padded inserts and clamp with lighter pressure.
Temperature matters too. Graphite shafts stored in a cold van or unheated shop overnight become more brittle until they warm to room temperature. If working in variable conditions, let clubs acclimate before clamping, and use lighter pressure than you would in a climate-controlled shop.
10. How Gripping Work Connects to Loft, Lie & Fitting
Regripping is often treated as a standalone task, but in a real fitting or repair workflow it rarely happens in isolation. A club coming in for a grip change is a natural checkpoint to verify loft and lie specs and run a quick swing weight check before the club goes back to the golfer.
See background in our companion guide, What Is Loft and Lie in Golf?, and Mitchell Golf’s official
Adjusting Golf Club Angles reference for the full technical standard.
11. Maintaining Your Grip Station for the Long Haul
- Clean the solvent recovery pan weekly to prevent dried adhesive buildup.
- Inspect clamp inserts monthly for wear or hardening rubber.
- Check the alignment bar for movement periodically.
- Keep the base plate bolts torqued on bench and floor models.
- Rotate solvent stock and keep containers sealed between uses.
- Store spare clamp inserts away from direct sunlight and heat.
12. When to Get Formal Training
This tutorial covers the mechanical sequence, but nothing replaces hands-on repetition under an instructor’s eye. Mitchell Golf’s 2-Day Intro Class and 5-Day Master Performance School cover gripping technique alongside loft/lie measurement, shaft work, and fitting.
From the Author: “The grip is the golfer’s only physical connection to the club. Every measurement we make with a loft and lie machine can be undone by a grip that’s misaligned or improperly bonded. Get this step right first.” Ed Mitchell, PGA